
 First post on the installation of a platform to measure the quality of applications with SONAR: the installation of a JDK or Java Development Kit.
But first, a word about our environment.
When you look at the SONAR installation documentation, you can see that it is possible to use it in a lot of different environments and configurations: Windows, AIX, Solaris, Linux, with Maven or Ant (or not), as a Windows service (or not), etc.
In my case, I installed SONAR on a simple laptop with Windows 7 (Professional Edition, Service Pack 1).
I see a lot of SONAR installed on Linux but as said before, this series of posts is intended to help in the installation and the use of a code analysis platform by people without technical profile. And usually, they work with Windows, which is still the main operating system in many companies, at least for personal workstations.
So, the installation procedures that I will present in this post and the following ones will be for a Windows 7 environment. They are detailed step-by-step, with a maximum of illustrations and explanations. So expect long posts with multiple pages!
What is JDK?
I will not give much explanation about what is a JDK or Tomcat: you can easily find more details on Internet. However, I will give a brief description so that every step of our installation and each component of our architecture is understandable, and try to avoid performing an installation following instructions stupidly and without understanding anything.
JDK or Java Development Kit is a ‘kit’ (or toolbox) for a programmer to develop Java applications. It includes a compiler, libraries and other basic components, but more importantly, it also contains the JRE.
The JRE or Java Run Time Environment includes a JVM (Java Virtual Machine) which allows you to run Java programs. Without going into details, let’s say simply that the JDK is required to run SONAR, Jenkins, Tomcat, etc.. It is indicated as the unique prerequisite in the documentation of installation.
Downloading the JDK
![]() We will download a JDK 6, from the following page: Java SE 6 Downloads, in which I chose the following JDK:
We will download a JDK 6, from the following page: Java SE 6 Downloads, in which I chose the following JDK:
It is possible that new versions appear on this page, so you can always choose a newer version of the JDK, but in any case this one here does work.
I will then choose a 64-bit version:

The 64-bit version works with my Windows 7 environment. You can choose the version that suits you, possibly with an administrator of your company, if you do not know what to download or to avoid installing an ‘unauthorized’ JDK that would pose a compatibility problem with some softwares already existing on your workstation.
Check the button ‘Accept License Agreement’:

 Oracle will ask you to log into your account. Yes, you must create an account before, and we will also need it to download the Oracle database.
It is not very complicated, you can do this now or create your account and start the whole procedure described here since the beginning.
Once logged in with your account, downloading may take place in the directory you specified.
Installing the JDK
Once the download is complete, we now have a file ‘jdk-6u35-windows-x64.exe’ in the destination directory. Run this executable, which will present you the following window:

In this window, activate (click) the ‘Next’ button. The following window appears …

… with a description of the different components that will be installed. We could deselect some (Source Code for example), but they take few space, so we will let the default options and click again on the ‘Next’ button. Note the installation directory by default, that we will not change.
The installation begins: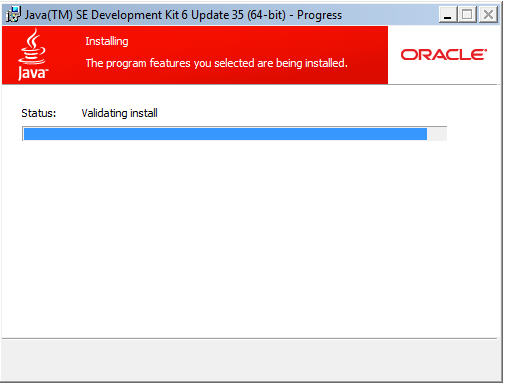
A window appears that allows you to change the default installation directory. I recommend you not to do so, not that this is a problem, but any JDK documentation will refer to this directory. And in case of problem, if you ask someone to help, he will be surprised not to find this directory and may think you do not have Java on your machine. And you could no longer remember any other directory you have chosen.

So we will keep with the default directory and activate the ‘Next’ button. The installation continues …

… until the final window.

Our installation is now complete. Let’s see what it looks like.
Validating the installation
This verification is also useful when searching where a JDK is installed.
Installation directory
We can verify that, in the installation directory ‘C:\Program Files\Java’, we now have:
- A sub-directory ‘jdk1.6.0_35’, with the JDK.
- A sub-directory ‘jre6’, with the JVM that will allow us to run Java programs.
Note that if you install a 32-bit JDK, it will be in the directory ‘C:\Program Files (x86)’.
Registry
The Windows registry lists the configuration of Windows and every installed software. Another way to check the installation of a JDK is to have a look at this database. To do this, we use the program ‘Regedit’ (simply enter the name in the Search bar for Windows programs or activate it from the directory ‘C:\Windows’).
 The registry is organized as a tree structure. The parameters or ‘keys’ configuration for Java are in the following path: ‘HKEY_LOCAL_MACHINE’, then ‘SOFTWARE’, then ‘JavaSoft’.
Select now ‘Java Runtime Environment’, then ‘1.6’, and you will see the following data, corresponding to the location of the JRE and JVM:

Now you know how to check if Java is installed and where it is located on a PC.
JAVA_HOME
We now have Java on our workstation. But we need that the programs that will use it are able to know where to find it. For example, if you have a Tomcat error message referring to your ‘JAVA_HOME’, it means that it can not find your JDK.
What is this ‘JAVA_HOME’? Just an environment variable that allows all users of the computer (a server for instance) to know a value, in this case, the installation directory of our JDK.
 In orer to create this variable, here’s how to proceed:
- Activate the Windows Control Panel.
- Click on ‘System and Security’.
- Then on ‘System’.
- Then on ‘Advanced system settings’ in the menu bar on the left of the screen. The following dialog box will appear:
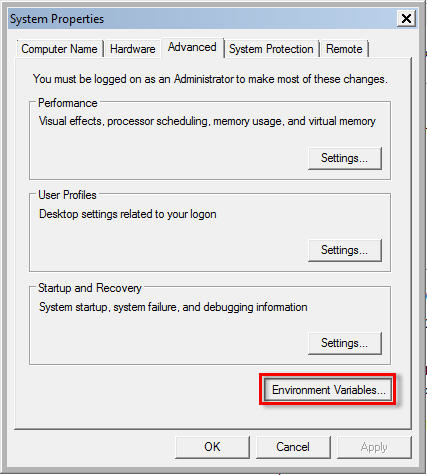
In this window, activate the button ‘Environment Variables…’ to display the following window:
In this window, activate the button ‘New…’ to create a new ‘System variable’ (so the second button ‘New…’ at the bottom after the second list box).
And in the dialog box ‘New System Variable’, enter the name of our environment variable ‘JAVA_HOME ‘, then specify the installation directory of the JDK:
 Confirm by clicking on the ‘OK’ button.
We will now add this variable in our PATH. The PATH is another environment variable that tells our machine, our PC, to find a program in the directories specified in the ‘PATH’, when it fails to find it in the default directory.
In the ‘Environment Variables’ window, select the variable ‘Path’ and activate the ‘Edit…’ button.

Then, in the editing box for this variable:
- Go at the end of the field ‘Variable value’.
- Add the following string: %JAVA_HOME%

We just added in our ‘PATH’ the value corresponding to our ‘JAVA_HOME’ variable, followed by the folder where are located binaries, so that other tools (like Jenkins for example) will be able to find executables like ‘java.exe’.
Confirm your entry with ‘OK’ in the previous windows.
Et voilà. We have completed the installation of our JDK. It is not so complicated when we follow precisely all the steps.
The next post will be dedicated to the Tomcat installation. In the meantime, good weekend to all of you.
This post is also available in Leer este articulo en castellano and Lire cet article en français.